INFO 1300: Designing a Website's Theme
Class 7: Designing a Website's Theme
- Course Feedback
- Designing a website's theme
- Color
- Imagery
- Typography
- Shape
- Alignment
- CSS Class Selector
Copyright 2026, Kyle J. Harms
Course Feedback: What's Working Well
- Interactive classroom
- Note-taking handouts
- Detailed notes
Course Feedback: What's Needs Improvement
- Wi-Fi in the classroom
- More practice for the Friday quizzes
- Less preparation, less homework, less practice quizzes, etc.
- Not enough office hours
- Due dates in Canvas, not course website
- Tentative schedule of assignments, etc.
- Insufficient note-taking space on notetaking handouts
Course Changes in Response to Feedback
- Additional report filed with Cornell IT to improve Wi-Fi
- Thursday peer homework and quiz study session.
- First session, tomorrow 9/17, 5-6pm
- Location: CIS Building first floor "ramble" (opposite end from Gimme!)
- Look for: "INFO 1300" on the whiteboards
- Office hour attendance has averaged 0 students; additional office hours by request; email info1300@cornell.edu. 1 business day notice required
- Additional space added to note-taking handout.
- Quizzes added to Canvas schedule (all other assignments already listed in Canvas).
- Renamed course schedule to Tentative Schedule on course website.
Review
Review: Familiar Layout
Familiarity can lead to better usability.
- Logo/Title top-left
- Nav Menu below header (no hamburger button)
- Important content visible first thing on page:
<h2>+ content - Footer at bottom of page
- Sections are clearly defined
- Sometimes with extra space
- Sometimes with a border
- Sometimes with a color
- Content fills the width of screen
- Main links are styled as buttons
- Not cluttered: plenty of vertical space between elements
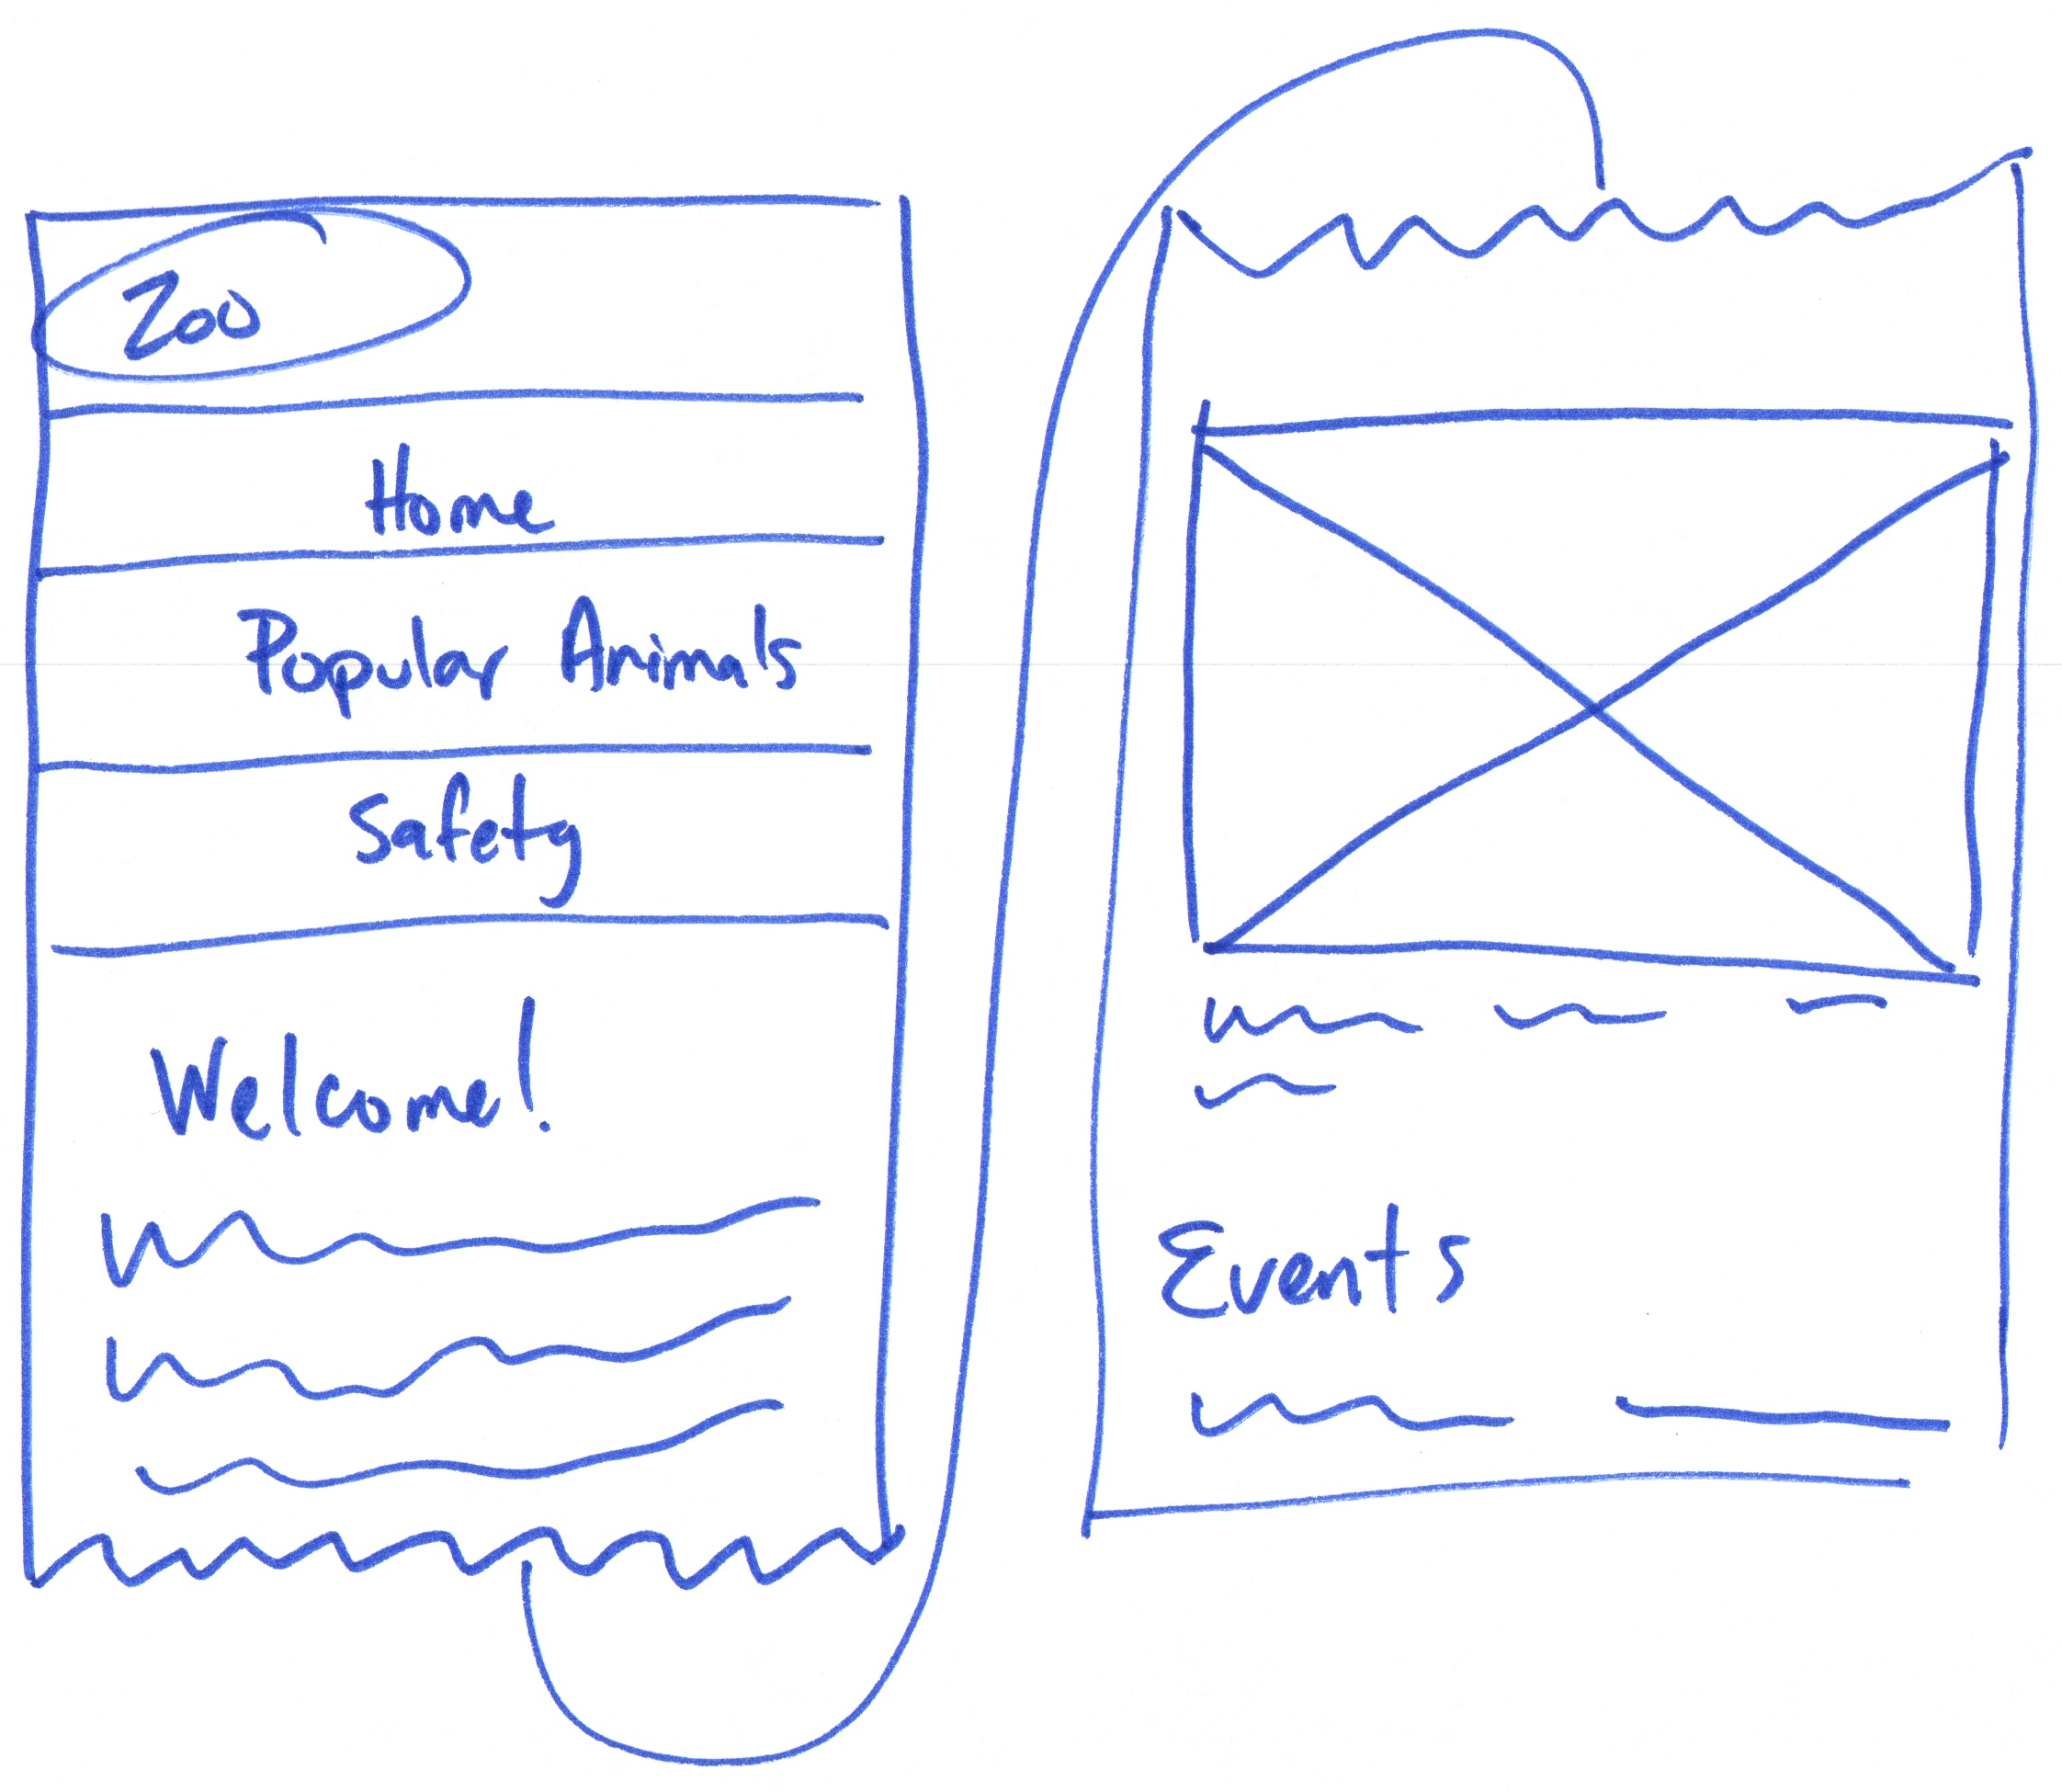
Review: Sketches
Sketch: A distinct form of drawing which designers use to propose, explore, refine, and communicate ideas.
Review: The CSS Box Model
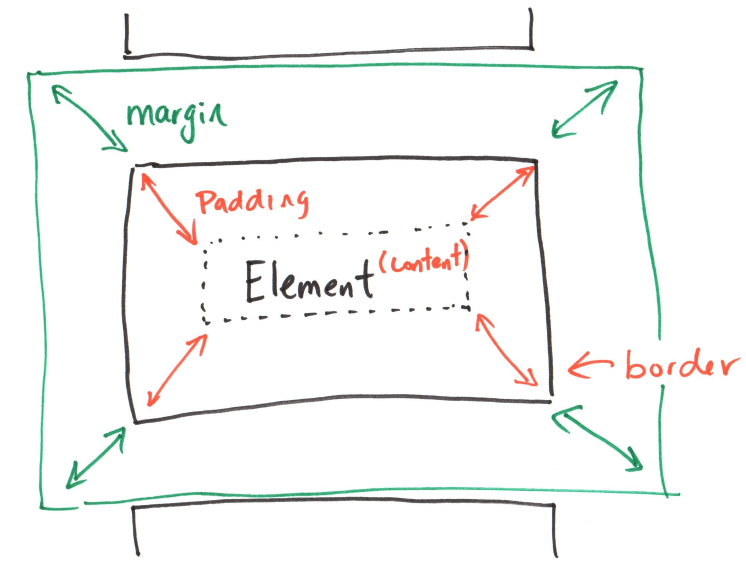
Margin: The space outside the box, between the box and other elements.
Border: The edge of the box.
Padding: The space inside the box, between the content and the border.
Theme
Visual Design – Website Theme
Visual design affects the way a website's visitors feel about a site.
- Color – foreground (text) vs. background contrast
- Imagery – pictures, screenshots, 😀 faces 😦, and symbols
- Typography – fonts, variants, weight, and style
- Shape – hard lines vs. soft edges
- Alignment – well aligned $=$ professional vs. centered $=$ amateur
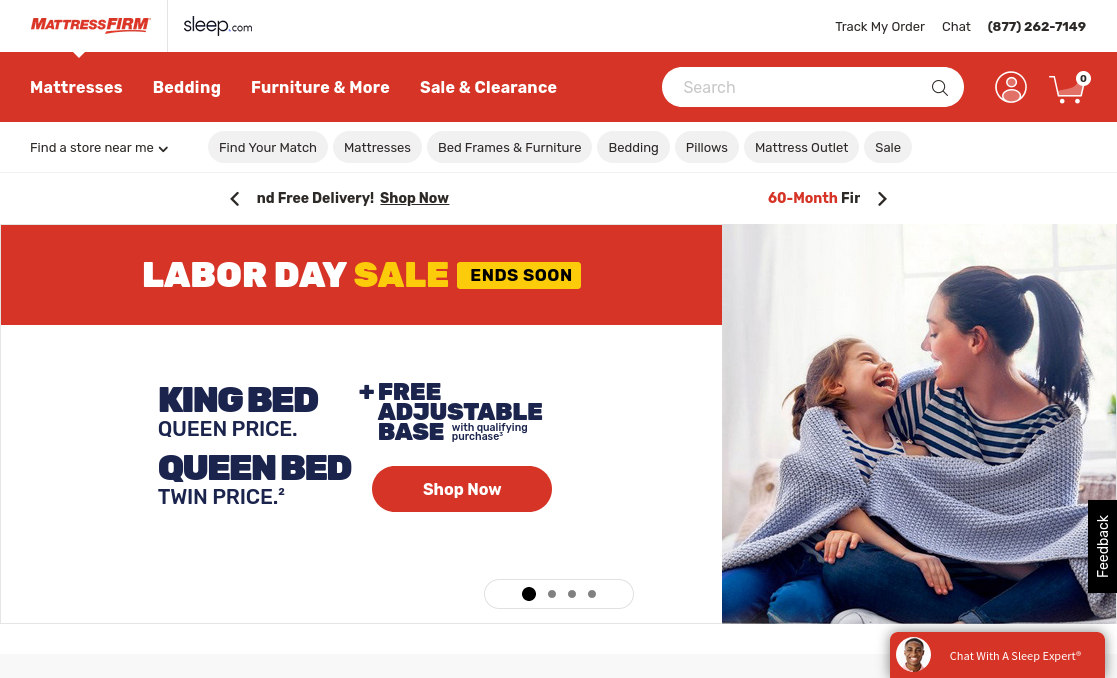
Discussion: color, imagery, typography, shape, and alignment.
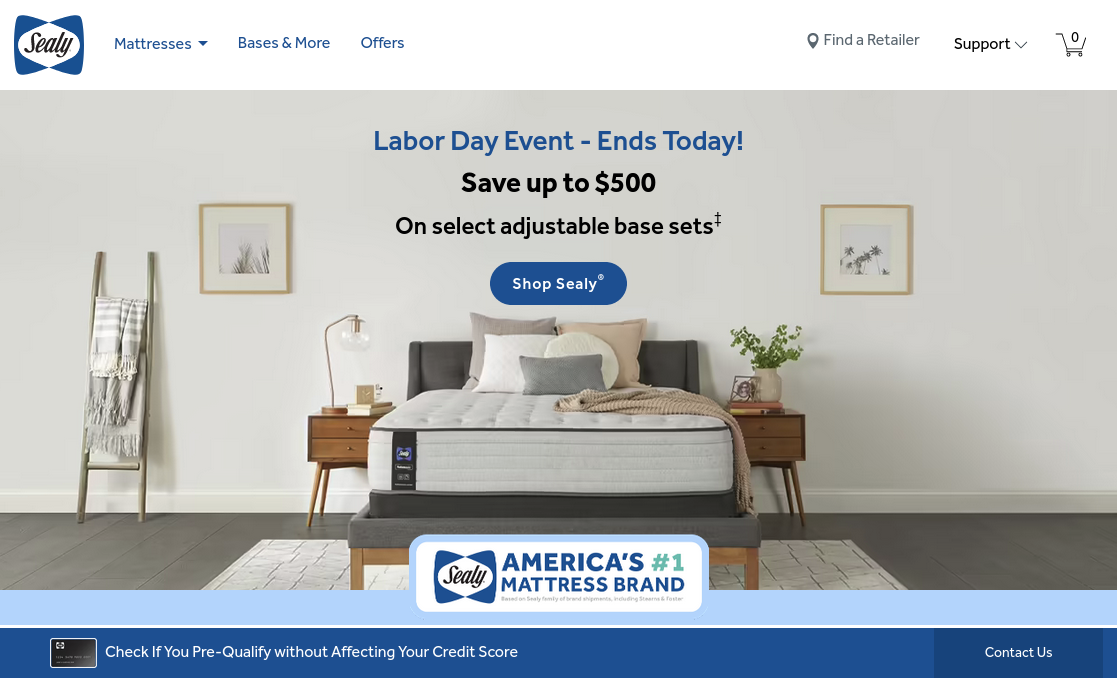
Discussion: color, imagery, typography, shape, and alignment.
Designing a Website's Theme
-
Understand your audience and their culture; understand the cultural significance of colors.
How does this audience perceive color and shape?
Example: Red can be positive or negative. Depends on culture.
-
Identify the emotions you wish to elicit in your site's audience.
Examples: professionalism, environmentally conscious, playful
-
Use visual design to pull out that feeling for visitors of the site.
Theme Tools: Color, Imagery, Typography, Shape, Alignment
Color
Color – Hue, Intensity, Value
Hue: the pure color itself.

Intensity: the intensity/purity of the color.

Value: the lightness/darkness of the color.

Carnelian (#B31B1B)
Example: How Color Elicits Emotion

Imagery
Imagery – "A picture is worth 1,000 words."
Use imagery to address user goals (content),
but also to make the site interesting (decoration).
-
Some images are content – they address a user's goal.
-
Some images are decoration – support the site's theme and add interest.
-
Decorative images should not over-shadow content images.
Content is king!
Tip: People love faces 😎; faces attract attention.
Content is King – Decorative Imagery

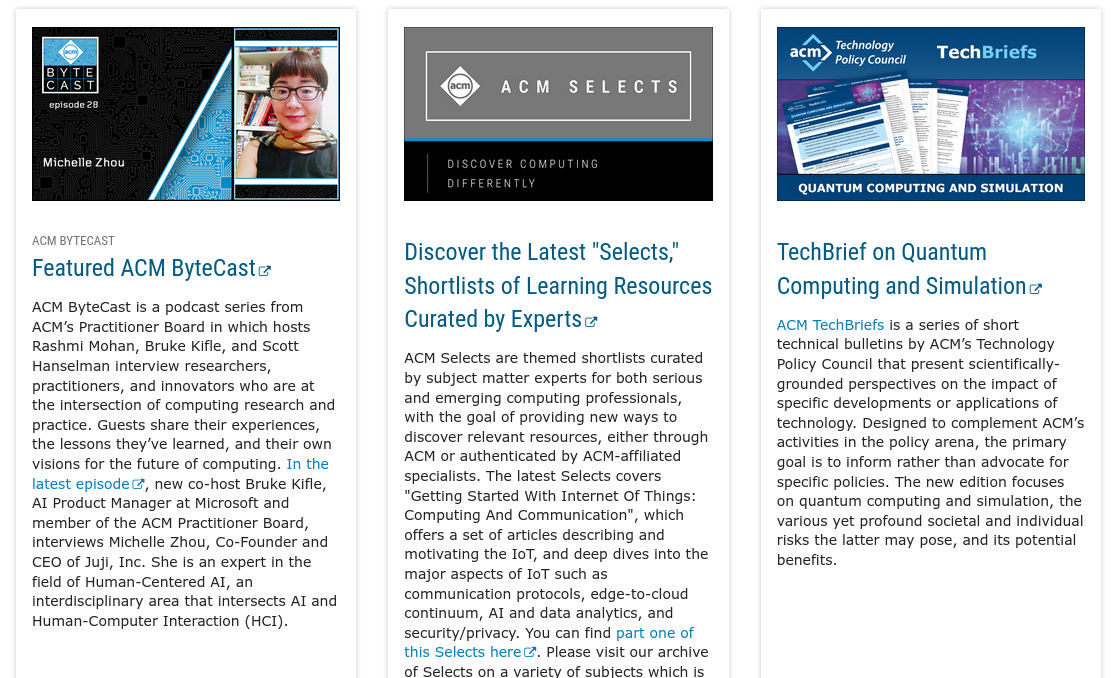
Example: How Imagery Aids The Design
Typography
Typography – Font Family
The shape of text communicates emotion too.
Typography – Font Styling
Example: How Typography Communicates to the User
Shape
Shape – Border, Border Radius
Use borders to emphasize or deemphasize the shape. Soften element edges or change shape (ellipse).
Tip: Avoid too many borders; hard edges attract attention
Colored/Bordered Boxes – <div>
Need a colored box or a border around content?
The <div> element's purpose is for styling only (not structure).
<div>
  <h2>Colored Box Example</h2>
  <picture>
    <img src="images/mcgraw-tower.jpg">
  </picture>
</div>
div {
  background-color: #B31B1B;
}
Colored Box Example

Activity: Implementing Shape
Complete Part I on your handout.
Add the HTML to create a box around the "Apple Pie Shakes".
Gotcha: <div> is for Layout/Styling Only!
<div> does not provide any structure. It is only for layout/styling!
<div>
  <p>This is paragraph resides inside a div.</p>
  <picture>
    <img src="images/mcgraw-tower.jpg">
  </picture>
  <p>So does this paragraph.</p>
</div>
This is paragraph resides inside a div.
So does this paragraph.
Alignment
Alignment – Guide the User's Eye
Most content should be left aligned for enhanced usability and accessibility.
Adjust margins and padding to guide the user's eye through multiple elements.
Caution: Use center alignment sparingly to draw the user's attention!
Example: Alignment in Design
Alignment: Text
h2 {
  text-align: center;
}

p {
  text-align: left;
}

blockquote {
  text-align: right;
}
Center Alignment
Large chunks of center aligned text are hard to read and harm both usability and accessibility.
Use center aligned text sparingly to draw attention to important content.
Lots of center alignment = unprofessional
Alignment - Centering Block Elements
-
Must be a block element:
img {display: block;} -
Set
widthand/ormax-widthproperty. -
Set left and right margins to
auto.margin-left: auto;margin-right: auto;
This block element has a width of 300 pixels. Margins are yellow.
The element is centered, not the text.
Activity: Centering Block Elements
Complete Part II on your handout.
Using CSS, center the box around the "Apple Pie Shakes" content.
Review:
blockelementwidthormax-widthmargin-left: auto;margin-right: auto;
Designing a Website's Theme
-
Find several example websites with themes that align with your website's audience.
-
Analyze the example websites' use of color, imagery, typography, shape, and alignment.
- What emotions do the colors invoke in the audience?
- What message is the imagery sending to the audience?
- Does the typography change the message?
- How does element shape impact that message?
- Does the alignment communicate professionalism?
-
Bring those elements into your website's theme!
CSS Class Selector
You want to style of one (or several)
elements, and not all of them?
Maybe you only want to change the style of just the first <p>, not all paragraphs.
Or you'd like the second <section> to have a different background color.
Or you'd like the logo <img> to use fixed dimensions, unlike the other <img> elements which use relative dimensions.
Class Selector
Class Selector: Selects all elements that have the given class attribute.
.CLASS_NAME {
  /* CSS property value pairs */
}
Gotcha: Observe the period before the class name. It's required!
<element class="CLASS_NAME">
  <!-- Element content -->
</element>
Gotcha: Observe there is no period before the class name.
Gotcha: No spaces in class names.
Example: Class Selector
.rounded-corners {
  border-radius: 20px;
}
<img class="rounded-corners" ... >
Tip: Use descriptive class names that describe the meaning or purpose of the styling.
e.g. warning, centered, title, navigation-bar, etc.
Activity: Class Selector Practice
Complete Part III on your handout.
Create the CSS classes to style the box around the "Apple Pie Shakes" and the "See More" button.
Multiple CSS Classes
-
Elements may belong to multiple CSS classes.
-
Separate classes in the HTML
classattribute with spaces.<element class="CLASS_1 CLASS_2 CLASS_3">
.rounded-corners {
  border-radius: 20px;
}

.centered {
  /* TODO */
}
<img class="centered rounded-corners" ... >
What's Next
Practice Quiz 3 (Class 6 & 7, Homework 3) on Friday.
Homework 4 now due Mon Sept 21, 2026 at 11:59pm.
Exam I moved to Wed Sept 23, 2026, during class.