Project 1, Milestone 3: Functional Meme Generator
In the third milestone, you will apply what you have learned about conditional rendering, event, state to create a functional meme generator.
The course material needed to complete this part was covered in classes 6, 7, 8, and 10.
Project Overview
For your first project you will design and implement an interactive meme generator single-page application using only React using only the methods taught in this course.
You may create any type of meme generator you like so long as it meets the assignment's requirements.
Simple is better for this assignment. I recommend a meme generator with a choice of 3 backgrounds, with 2 lines of text, and the choice to change text styling for each line (e.g. font, color, outline, etc.)
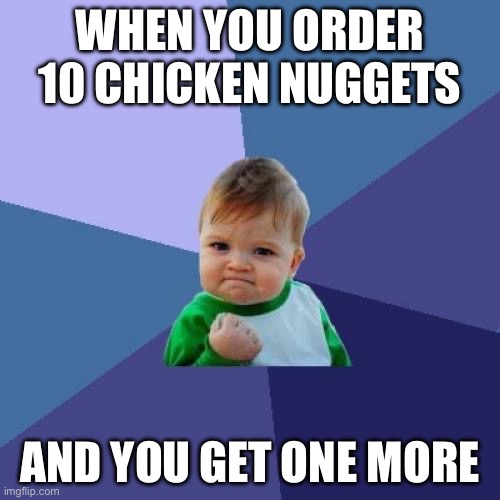
Here is an example of a "meme" that would likely fulfill the assignment's requirements:
Learning Objectives
- Use conditional rendering to display user relevant information.
- Respond to user events.
- Pass data into components using props.
- Remember a components data using state.
- Send data out of a component using a prop handler.
- Lift state up to a common parent to share data between components.
- Control the value of an input using state.
- Use the React Developer Tools to debug your React applications.
Help & Support Resources
We want you to get the help and support you need. Use the course's support resources for help with this assignment.
Git Repository & Codespace
-
Create your assignment repository.
Visit https://landrace.infosci.cornell.edu/courses/info2310-2026sp/repos/project1 in your browser to create your assignment repository.
-
Open your assignment repository in GitHub.
After creating your repository, visit https://landrace.infosci.cornell.edu/courses/info2310-2026sp/repos/project1 in your browser and follow the link to open the repository on github.com
-
Open your assignment repository as a codespace.
Submission Requirements
Your assignment should meet the following requirements for credit:
-
Submit your own original work (design and code) for this assignment.
No credit is provided for submitting design and/or code that is taken from the course-provided examples.
-
Your code should be original. However, the structure of the code will mirror the class examples.
The structure of your code will align with the class examples. This is to be expected. We are learning web programming and there's only so many ways to structure code to solve its problems.
-
You are required to use the methods and techniques covered in class.
No credit is provided for using methods that are not covered in this class.
-
Your single-page application should be visible in the browser and functional upon launching the development web server Start Debugging from the Run menu.
If your single-page application does not launch using this method or is not visible in the browser after launching the server, we are unable to provide any credit.
-
All files should be in the location specified in this document for credit.
Professionalism is important. Incorrectly placed files will not be graded; no partial credit is provided either.
-
Follow the submission instructions below.
Submit all materials to your GitHub repository's main branch for this assignment. When you're finished stage, commit, and push your submission to GitHub. Then fill-out the submission form to complete your submission.
Failure to complete the submission form will result in 0 credit; no submission form = no submission. No leniency. No exceptions.
Part I: Component Tree Plan
Draw a component tree to plan the primary functionality of your app. Your plan should include the props, state, and handlers you will need to support an updatable background, meme text and meme text appearance.
Requirements & Credit
Credit: ~10 points (Project 1)
This part is graded for correctness. Create a component tree plan that meets the following requirements for full credit:
Component Tree Plan:
- The component tree should accurately represent how the data will flow through your meme generator web application.
- Draw a box for each component of your application as specified in the previous milestone.
- Accurately represent the hierarchy of your components.
- Parent components should be drawn above children components.
- Draw lines to connect parent components to their children components to show the hierarchy.
- Include all props, state, and handlers that are necessary for the primary functionality of your app.
- Include only one of each type of component in your component tree plan. (i.e. Only include 1
MemeTextcomponent, 1MemeTextEditorcomponent, etc.) - Annotate your component plan with arrows accurately showing the flow of data from state to prop and from prop handler to state.
Your component tree plan must employ the approach taught in class and accurately reflect your code's implementation for credit.
Professionalism:
Professionalism means meeting the client's requirements. Not doing less and not do more. Your submission should meet the requirements specified for this part and no more.
You are required to implement your project using the methods taught in class prior to the release of this milestone.
Instructions
-
Draw a component tree to plan your app's primary functionality.
First draw a box for every component in your app.
Only include one component for each type of component you need. For example, if you need 3 text components, you should only have 1 text component in your component tree. (This is to help simplify the component tree drawing.)
Structure the hierarchy of your component boxes to match the structure of the components as specified in the previous milestones.
Parent components should be drawn above children components. Draw lines to connect parent components to their children components to show the hierarchy.
You should have a box for
App,MemePreview,MemeText, andMemeTextEditor. -
Next, labeled your existing props on the component tree for each component.
-
Add a state for the background, 1 line of meme text, and the appearance of one line of meme text in the
Appcomponent. -
If a state needs to be passed down to a child component, draw an arrow from the state to the child prop.
The arrow head should point directly to the prop that will receive the state.
-
If a child component needs to send data to the parent component's state, add handler props to the child component.
Name all handler props with an
onprefix. For example, if you need a handler to update the background, name the proponBackgroundChange. -
Draw an arrow from each handler prop to the component that will be updated.
-
Upload your component tree drawing to your
design-planfolder at the root of your repository as PNG, JPG, WEBP, or PDF file. (No HEIC files.)
Submission
Stage, commit and push all changed files in your Git repository to the GitHub server. (All commits should reside on the main branch.)
Do not complete the submission form.
Part II: Background Functionality
Implement the background functionality of your meme generator web application using only props, state, event handlers, and controlled inputs. (You need not use all of these methods for credit.)
Requirements & Credit
Credit: ~10 points (Project 1)
This part is graded for correctness. Implement a draft version of your interactive meme generator web application that meets the following requirements for full credit:
-
Create a single state for the background.
-
Pass the background state down to the
MemePreviewcomponent using props. -
For all input-type elements (i.e.
<input>,<select>,<textarea>, etc.) control their value using state. (You need not use these input elements for credit.) -
Use event handlers to update the state for
<button>elements. -
The initial value of the background state should be set to the sample meme's background.
-
For credit, the background should immediately update in the live preview when changed by the user.
-
You may not use objects for any state in this milestone.
Professionalism:
Professionalism means meeting the client's requirements. Not doing less and not do more. Your submission should meet the requirements specified for this part and no more.
You are required to implement your project using the methods taught in class prior to the release of this milestone. You may not work ahead to implement functionality that has not yet been covered in class.
If any functionality exists not covered in class up to this point, 0 credit is provided for this part.
Instructions
-
Create the state for the background.
Remember, the user may select a background image from a pre-selected set of images. You may let the user upload an image or provide a URL to an image.
-
Copy the sample values for the background props for your sample meme into the initial value for the state.
-
Pass the background state down to the
MemePreviewcomponent using props.Your sample meme's appearance should remain the same.
-
For all input-type elements (
<input>,<select>,<textarea>, etc.) control their value using state.If your design does not use input elements for the background, that's fine. It's not required for credit. You may move to the next step.
Note:
<button>element cannot be controlled using state. You need not worry about controlling the value of any<button>elements. -
Test changing the background for your meme in your web application.
When you change the background, the live preview should immediately reflect that change.
Submission
Stage, commit and push all changed files in your Git repository to the GitHub server. (All commits should reside on the main branch.)
Do not complete the submission form.
Part III: Meme Text & Appearance
Implement the meme text and appearance functionality of your meme generator web application using only props, state, prop handlers, event handlers, and controlled inputs.
Requirements & Credit
Credit: ~30 points (Project 1)
This part is graded for correctness. Implement a draft version of your interactive meme generator web application that meets the following requirements for full credit:
-
Create a single state for each line of meme text.
-
Create a single state for the appearance of each line of meme text.
-
Each state should use a single primitive value (e.g. string, number, boolean, etc.) rather than an object or array.
-
If you need multiple states for the appearance of a single line of text (e.g. font, color, outline, etc.), you should create a separate state for each aspect of the text's appearance.
-
Each state should initialize to your sample meme.
-
Lift the meme text and appearance states up to the parent component.
-
For all input-type elements (i.e.
<input>,<select>,<textarea>, etc.) control their value using state. -
Use only props, state, prop handlers, event handlers, and controlled inputs to implement the meme text and appearance functionality.
-
Name all prop handlers with the
onprefix. -
The initial value of each line of meme text and its appearance should be set to the sample meme's text and appearance from their states.
-
For credit, the text and appearance of each line of meme text should immediately update in the live preview when changed by the user.
Professionalism:
Professionalism means meeting the client's requirements. Not doing less and not do more. Your submission should meet the requirements specified for this part and no more.
You are required to implement your project using the methods taught in class prior to the release of this milestone. You may not work ahead to implement functionality that has not yet been covered in class.
- You may not use objects for any state in this milestone.
If any functionality exists not covered in class up to this point, 0 credit is provided for this part.
Instructions
-
Create a single state for the first line of meme text (not the appearance).
-
Set the initial value of the first line state to the first line of text in your sample meme.
-
Pass the first line state into the
MemePreviewcomponent using props.If done correctly, no changes to the appearance of the first line of text should be visible in your sample meme.
-
Create a prop handler for updating a line of meme text in the
MemeTextEditorcomponent. -
Control the value of the meme text's input in
MemeTextEditorusing a prop to set thevalueof the input and an event handler (onChange) to update the (parent's) state using the prop handler.In other words, when the user changes the meme text, call the prop handler to update the state for the text in the parent component.
-
Test the
MemeTextEditorfor the first line of text.When you refresh the browser, the first line of text's editor should display the sample meme's first line of text.
When you change the text in the editor, the live preview should immediately reflect that change.
If this does not work, go no further.
-
Create a state for the appearance of the first line of text, control it its input in the
MemeTextEditor.Test that the appearance's initial value for the sample meme is displayed in the editor when the page is refreshed. Test that the live preview immediately reflects changes to the appearance made by the user.
-
Repeat the above process for the second lines of text and their appearance.
-
Thoroughly test your meme generator.
All aspects of your meme generator should be completely functional. The user should now be able to create a meme of their own!
In the final milestone, you'll tidy up the state and add some additional features to your meme generator.
Submission
Stage, commit and push all changed files in your Git repository to the GitHub server. (All commits should reside on the main branch.)
Complete the submission form for p1m3 to submit the assignment.
Note: The submission form asks you to check your submission. Checking your work will ensure you receive credit for this assignment. We ask you to check your submission because this is where some students lose points. It's easy to forget something and checking your work prevents the heartache of getting a 0 because your submission wasn't submitted in a way that we can access and grade it.
Contributors
Copyright © 2024 - 2026:
- Kyle Harms